Wednesday, June 4, 2014

Bottling Day: Caribou Slobber

My typical fermentation schedule is to package a beer 3 weeks after it was brewed, so this weekend was time to get the Caribou Slobber into bottles.

There are two methods of packaging: bottling and kegging. Bottles are much more portable and easier to share with others, but you're limited to 12-ounce servings and the bottling process takes longer (takes me 3 hours from setup to cleanup). Kegs are more convenient in the home, you can pour whatever small or large glass you want, you usually need to transfer to another vessel (like a bottle or growler) when sharing with others, and the kegging process takes under and hour.

Because kegging equipment is much more expensive ($200-300 plus refrigeration unit), most beginning home brewers start out with bottling ($50-75 for everything).

Me, I've bottled 989 bottles these 2 1/2 years. This, roughly, is how I do it.

First, the entire area needs to be prepped. All surfaces get a wipe down or sweep. I use the entire kitchen table and the floor immediately in front of it.


All equipment gets brought out and assembled. Everything that will come in contact with the beer gets a few minutes of contact time with the no-rinse sanitizer - buckets, hoses, tubes, clips, bottles, caps. It sounds a lot more complicated than it really is.


Next: siphoning the beer from the fermentor to the bottling bucket. A measured amount of sugar gets boiled with a bit of water then cooled and added to the bottling bucket, and the beer gets "racked" on top of it. The sugar gives the yeast enough food to consume so it can produce a bit more CO2 in the bottle, which gives the finished beer its carbonation.


The bottling bucket is moved onto the table, and the hose and bottling wand are attached to the bucket. The bottling wand has a spring loaded tip that opens a valve when depressed on the bottom of the bottle. When the bottle is filled, I lift the wand, stopping the flow of beer and leaving the perfect amount of head space in the bottle.


The question I get asked most frequently about bottling: How do you get the cap on? A special capper presses the crown onto the bottle and crimps it in place.


In the earlier step when I transferred the beer to the bottling bucket, I grabbed about 6 ounces of beer in a Pyrex cup. I put this sample in a hydrometer jar so I can measure the specific gravity, which tells me the concentration of sugars in solution. It's tough to see in this picture, but it's reading 1.018. My hydrometer reads 2 points high, so the corrected reading is 1.016.

When I subtract this from my original gravity of 1.051 and multiply by 1,000, that's 35 gravity points consumed by the yeast. Multiply 35 by about 0.13125, and we have 4.6% alcohol by volume.

The 6-ounce sample then gets used as a taste test. It now tastes very close to what the final product will be, but it's flat and warm. This batch tastes very chocolaty with a mild bitterness. This brown ale tastes like it's approaching a porter.


The finished bottles go into a case, then into a space that's between 65 and 75F (usually a closet). After three weeks, a few bottles get put into the fridge for a week before tasting day.

My haul on a 3-gallon batch is between 28 and 30 bottles, or about five 6 packs. It's a lot of work for just over a case of beer, but because I brew every 2-3 weeks, I usually have respectable variety in my beer fridge.

How to celebrate my 3 hours of labor? A little Sharknado and a glass of Saison Dupont. I'm classy like that.


Saturday, May 10, 2014

Brew Day and Temperature Control Update

Finally got around to my Caribou Slobber brew day!

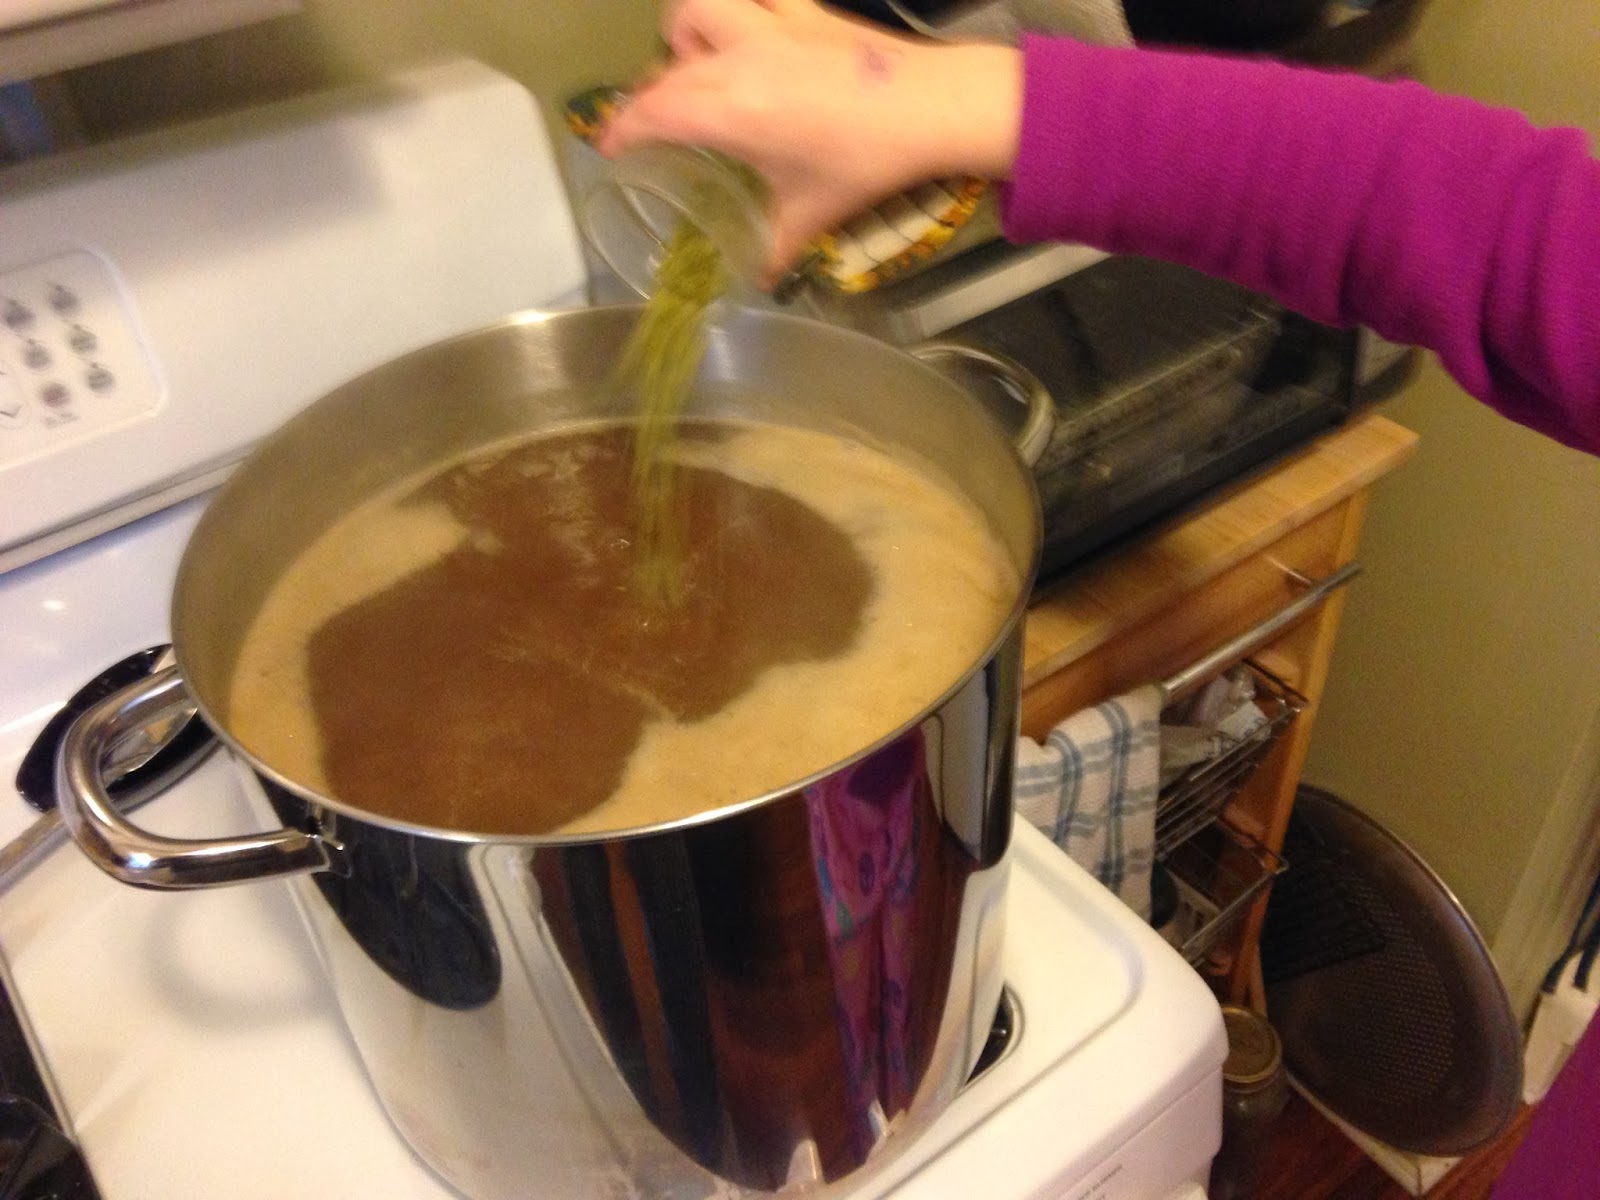
Boil underway
This beer holds a special place in my heart. It was the third batch of my homebrewing career (May 2012). It was also the first batch where I used any sort of temperature control for fermentation. The beer won 2nd place in a small competition, and it was a favorite of friends and neighbors.

The session went about as planned, though I ended up with a little more volume (3.182 gallons rather than 3.0) and consequently a little less concentrated fermentable sugars (4 specific gravity points, to be exact), so the beer should be about 5.0% abv rather than 5.5%. Meh.

Chilled to 107F in 4 minutes.
Not bad! 47 degrees to go.
After chilling, into the new fermentation chamber it went. Until this batch, I've been fermenting most of my beers in the neighborhood of 67 or 68F. That's a good range for the yeast I normally use (Safale US-05), and it's also been relatively easy to keep a water bath at that temp in a hot Kansas City summer.

I'm using a different yeast on the Slobber (Danstar Windsor Ale). Some people love it, some people hate it, and even the people who love it hate it when it ferments above about 64F. It can produce way too many fruity esters that get in the way of the rest of the beer. So, after chilling the wort after the boil to 60F, I rehydrated the dry yeast and pitched, then into the fermentation chamber set for 62F. That should give me the right level of fruity esters from this English style yeast and accentuate the maltiness in this otherwise American style brown ale.

Fermentation chamber doubles as storage for empty fermentors
I expect fermentation to be done within the next few days, then I'll slowly raise the temperature about a degree each day for the first week or so to let the yeast clean up after themselves (they can get a little messy). In the meanwhile, the 1-gallon Vienna/Northern Brewer SMaSH from a couple weeks ago is hanging out in the chamber with the Slobber. I'll likely bottle the SMaSH next weekend.

The airlock on the Caribou Slobber
sporting a new 'do

Sunday, April 27, 2014

Weekly Update

Lots of chores going on around the house today, but there's just enough time to update on the happenings of this weekend.

Brew Day: Vienna/Northern Brewer SMaSH

r. to l.: NB hops, Irish Moss, NB hops,
yeast nutrient, NB hops, NB hops
I was originally planning on brewing a 3-gallon batch of Caribou Slobber, but I really only had the energy to do something simpler. A 1-gallon SMaSH (single malt and single hop) beer was just the ticket. The only base malt I have at the house is simple 2-row, but wanting something with a little more flavor, I headed to my local shop and picked up a couple pounds of Vienna. That along with some Northern Brewer hops will get me a beer around 7% abv and hoppy enough to call an IPA.

SMaSH fermenting actively
in a water bath
I've only used Vienna once before, in a SMaSH with Centennial, and I really liked it. It has a subtle toasty/biscuity flavor. And I've only used Northern Brewer in a hoppy, IPA strength brown ale. It gives a flavor and aroma that some describe as a combination of mint and evergreen. I'm interested in seeing this malt and hop variety together.

Tasting Day: Scottish Heavy 80/-

Saturday was (finally!) tasting day for my 80 shilling. It was indeed an improvement on the 70/- I did last year. Starting with RO water and building up my mineral profile with salts (calcium chloride and gypsum, to be precise) definitely helped round off some harsh edges from last year's batch. My final gravity - the specific gravity of the beer post-fermentation - was a bit higher than I anticipated, so it's surprisingly full bodied considering it's only a 4.3% beer. But it's a little sweet in the finish. I need to figure out if that's a fermentation flaw (from under attenuation) or if I just need to adjust my recipe. Or both.

Bottling Day: IPA

I brewed an IPA two weeks ago. I often let beers sit in the fermenter for 3 weeks before bottling, but I'm eager to get on to tasting this, and impatience got the best of me. But I'll let it sit in the bottle for 3 weeks followed by a week in the fridge before I open up the first one, so it's hard to call that impatient.

I'm running a bit of a water experiment on this batch. The sulfate ion in water accentuates the hoppiness and hop bitterness in beers. Our tap water has about 160 ppm sulfate, and I was happy with that concentration when I brewed this recipe last year. I decided to up it to 300 ppm - almost doubling it into a range that some people really like for their hoppy beers. When I tasted a sample last night at bottling, I could clearly tell the difference in the sulfate level. I think I'm going to like it lower, but I'll reserve judgment until I get a better sense of the beer when it's carbonated.

If all goes well, I'll brew that Caribou Slobber next weekend, plus tasting day for my Victory Blonde!

Friday, April 18, 2014

Temperature Controller Project

When I talk with prospective homebrewers, I always tell them the three most important things in brewing are 1) cleaning, 2) sanitizing, and 3) fermentation temperature control.

Cleaning and sanitizing are no brainers, and they are actually pretty straightforward to do.

But it took me a few batches to realize that because brewers make wort and yeast make beer, keeping the fermenting beer within proper temperature ranges helps the yeast make the best beer possible.

To that end, I've been doing very rudimentary temperature control. I invested in a 16-gallon rope handle tub a couple years ago. My fermenter goes in the tub filled with water just below the beer level, and I control the temperature of the water bath by adding ice or frozen water bottles. Because the temperature of the water bath is usually within about a degree of the temperature of the fermenting beer, I'm able to keep the beer right at the temperature I want - usually around 68F, sometimes down near 64F depending on the yeast strain I'm using and what I'm wanting out of the beer.

It's not a lot of work keeping the water bath at these temps, but I do find I have to check on the water temperature every few hours. I consider it a labor of love, but now I'm ready to take it to the next step: setting up a fermentation chamber.

The concept of a fermentation chamber is actually pretty simple. A chest freezer fitted with a temperature controller is a great way to go. You plug the freezer into the controller and the controller into the wall, place the temperature probe from the controller into the freezer, set the temperature on the controller, and it turns the freezer on and off to maintain the set temperature.

Getting the hardware together.
The knock out for the controller is
already rough cut here.
You can buy temperature controllers already wired and ready to go, but I decided to do it on the super cheap and buy one that I wire myself. With the help my favorite homebrewing forum and a handy YouTube video, I was on my way.

All wired up
The hardest and most time consuming part of the whole project was cutting out the holes for the controller and outlet. Drilled holes in the four corners and a coping saw got the rough cuts done quickly enough, but filing back the holes to where I needed them took about 30 minutes per hole.

Project finished!
The wiring was the easiest and most fun part of the project. Since I had good diagrams and was able to source color coded wires, it was a snap.

The total project cost was about $32: I grabbed the controller on a price drop for just under $17 on Amazon, and the rest of the hardware came in at about $15 at my local big box. Considering wired dual stage controllers can range between $100 and $300, I'm going to chalk this up to $100-$200 saved. Yeah, me!

Next step: buy a 5 cf chest freezer!

Saturday, March 22, 2014

Brewing On Location

Measuring out the grains
One of my favorite smells in the world is the aroma of the indoor brewery. It's intensely grainy, bready, and sweet, and somewhere in there is the citrus/earthy/floral/pine of the hops - depending on the varieties called for in the recipe.

When I brew in the morning, the kids love waking up to those aromas. And when I brew in the evening, the fragrance can be strong enough to wake me up throughout the night.

Not everyone is so fond of it. My lovely wife thinks all hops smell the same - like new carpet. (I don't fully agree. I get a lot of stink weed from Amarillo.)

Grains waiting to be mashed
As a concession, I'm resolving to brew more of my batches outside. I got a LP burner last year for the express purpose of brewing outside, but 1) I hate brewing in Kansas City's really hot or really cold weather, and 2) brewing inside on the stove is so much more convenient. If I need a Pyrex measuring cup, it's right there in the cupboard. I can easily wash equipment from the previous step while water is heating for the next. Or I can brew a cuppa or grab a bite without having to worry about a boil over from an unattended kettle.


But brewing outside has its advantages. The prime of which is . . . being outside! The same primal feeling I get when grilling outside I get when I brew outside. Away from distractions, just me and the wind in the trees. And the squirrels.

Happily fermenting away
Mainly because I'm not used to it yet, I really had a hassle with this week's brew day (my Victory Blonde). It was WINDY. With 20-25 mph winds and buds on the trees, there were all manner of particles flying around in the air. But no worries - if they hit the boiling wort, they'll be sanitized. Right?

I also made a personal record for number of trips in and out of the house in a 3-hour period. That Pyrex measuring cup? Safely in the cupboard. Inside. And I'll need to wait to do all the cleaning up afterwards. Want to make a sandwich? Better keep an eye out that window to monitor the boil.

I know it'll get easier as I make my mental (or paper) checklist of all the equipment I need to take with me. But until then, I need to prepare myself for the prospect that this may feel a little less like relaxation and more like work.

Sunday, March 16, 2014

Tasting Days: Irish Red and English Bitter

The way I schedule my batches, it takes about 7 weeks to go from grain to glass: fermenter for 3 weeks, in the bottle for 3 weeks, then a week in the fridge. Then enjoy.

I'll tell you right now: it is not easy waiting that long.

The best way to counteract impatience is to have a good pipeline in place. If I can brew every few weeks, then I have batches in various stages of production, and it gets my mind off any single batch.

It also means I sometimes have the happy fortune of beers ready for their first tasting day in consecutive weeks.

Such was the case with two of my latest batches, an Irish Red (last week) and an English Bitter (this week).

I had brewed a batch of this Irish Red last year and really enjoyed it. I wanted to rebrew it this year in time for St. Paddy's Day, but I didn't want a full case of it, so I just made a small 1-gallon batch that yielded 9 bottles. I made a small adjustment to the grain bill over last year's batch - I cut the roasted barley in half, which made the color of the final beer a bit lighter - and I made some changes to how I treated the water in order to highlight the malt character over the hops.

This year's Irish Red is indeed lighter in color, but the reduction in the roasted barley also cut back the roasted character of the beer. Irish Reds don't have the roastiness of a stout, but they should have just enough roast to leave a dry finish on the palate. Next time I brew this recipe, I'll probably try to source a lighter color roasted barley, so I can have the lighter color as well as the drier finish.

The beer I was really waiting to try was the English Bitter.

Bitter is one of the many styles I've never tried. It's not easy to find commercial examples in the States, and I hear they're getting difficult to find even in the UK. But I also hear they can be a fantastic drink.

If you can't find it in the store, why not make your own?

I had planned to open my first bottle of the bitter on Saturday, but I just couldn't wait, so Friday it was. I was so happy with how it turned out, I ended up dreaming that night I was in England, hopping from pub to pub, drinking this delightful brew.

The first thing to note is that bitters are not bitter. The recipe I brewed is balanced toward the biscuity malt, but it finishes just dry enough to drive you back for another sip. And at 4% abv, it's easy to drink by the pint. The characteristically low carbonation and higher serving temp (around 55° F) make this bitter go down very smooth.

Two lessons learned: never judge a style by its name, and always try to have some bitter in the pipeline.


Sunday, March 9, 2014

Brew Day: Scottish Export 80/-

I have to admit: Scottish ales are some of my favorite beers. I only discovered them about a year ago, and I honestly cannot remember the first one I tasted that I fell in love with. But if you ever catch me daydreaming, I'm likely thinking about how to brew the perfect Scottish ale.

Why do I love this style? This is a beer that is very malty. It's about as far from a hoppy IPA or pale ale as you can get. Scottish ales are not bitter and have almost no hop presence. The malt will often have notes of caramel and sometimes toffee, and may have a very small smokiness. The fermentation profile is usually clean, with little or no flavor contribution from the yeast.

When I'm in the mood for malt, I'm in the mood for a Scottish ale.

Scottish ales usually come in three strengths: Scottish Light 60/- (read, "sixty shilling), Scottish Heavy 70/-, and Scottish Export 80/-. The strengths were historically identified by their cost per hogshead, a type of cask that held about 63-65 US gallons. In today's designations, a 60/- is under 3.2% alcohol by volume, a 70/- goes up to about 4%, and an 80/- can top out at about 5%.

There is another type of Scottish beer that goes by the name Strong Scotch Ale, or Wee Heavy. They're usually between 6.5% and 10%, and have even more malty sweetness than the smaller ales.

As much as I love these beers, I've only tried my hand at brewing two of them: a Scottish Heavy 70/-, and a Wee Heavy. I was relatively satisfied with both beers, but both had their weak points. On the 70/-, the body was thin and the malt backbone didn't stand out as much as I was hoping. The Wee Heavy is a nice winter warmer at 9% abv, but the alcohol presence is a bit rough and gets in the way of the other flavors.

So, the way I saw things, it was time to brew another Scottish ale! This time, I made a few changes to the biggest ingredient - water - in order to give it more body and accentuate the maltiness that I crave.

The brew day was uneventful. Which is to say that it provided just the relaxation that I needed.


Starting with almost 6 lbs. of unmilled grains.


Daddy's little helper with a hop addition to the boil.


At the end of a 4-hour brewing session, 3 gallons of wort!

Actually, 3 gallons and 3 ounces to be precise, but who's counting?


In just a few days it'll be done fermenting, but I'll allow another 2-3 weeks for conditioning while the flavors all blend and stabilize. Then bottling, followed by 3-4 weeks of bottle conditioning.

This one's going to be difficult to wait for!

Sunday, March 2, 2014

2013: A Year in Beer

I know it's a little late to be doing a review of the previous year's work, but sitting here with an IPA in my hand, I find myself in the reminiscing mood.

To recap, in 2012:

  • 8 batches brewed, totaling about 40 gallons. All batches were 5 gallons.
  • All batches were extract plus specialty grains.
  • My faves were an amber ale, a brown ale and a saison. The wife's fave was a premium bitter.
In 2013:
  • 21 batches brewed, totaling about 43 gallons. All batches were 1 or 3 gallons.
  • All batches were all grain.
  • My faves were a brown ale, which I ended up brewing twice, and an IPA. The wife's fave was a blonde ale.
The biggest change in 2013 was that I started brewing all grain rather than with extract. That is, rather than starting with liquid malt extract (LME) syrup and reconstituting it with water to make wort, I created the wort from scratch using malted barley. All grain brewing tends to be more difficult because the extra procedures require greater precision with measurements as well as holding water at desired temperatures, but all grain brewing gives the brewer greater control over the final product. And because all grain starts with, well, grain, the final beer tends to be fresher.

I also changed my batch size from 5 gallons to 3. I did this mainly because it allowed me to move to all grain using the same equipment I was using for extract. But I also found that it allowed me to brew a greater variety of beers in a shorter amount of time. I noticed that after about month of drinking the same beer, I'm ready to move on to the next, and 3-gallon batches keep me from getting tired of a particular beer.

One-gallon batches were also a new found joy. A single gallon batch yields about 8-10 bottles and take about the same amount of time as a 5-gallon batch (about 4-5 hours on brew day), but they're great for experimental recipes or for brewing styles I'm not sure I'll like. Unfortunately, my last couple 1-gallon batches - a brown porter and a West Coast style amber ale - were quite tasty, and I regretted making so little. So I may start to reserve 1-gallon brewing for riskier recipes, or to squeeze in a brew day when my pipeline is already pretty healthy.

In 2014, I'm on pace to top the number of batches from 2013. I've already brewed four batches and have another lined up already for next weekend. My homebrewing career is only a little over 2 years old, but I really feel I've just begun.

My glass of IPA is now empty, and reminiscing has come to an end. Now to plan my next couple of brew days!

Sunday, February 3, 2013

Missed It by That Much

What could be better than brewing two weekends in a row? Brewing three weekends in a row!

Two weeks ago, I decided to shake things up a bit. I'd always been brewing batches that finish with about 5 gallons (or about 2 cases) of beer. This is the most common batch size for homebrewers. I'm not sure why that becomes the default volume for so many homebrewers, but it can seem difficult to break out of that rut and brew different batch sizes.

Thanks to my brother, I was able to do two things: realize that I can easily brew a smaller volume on my stove top with equipment I already have, and make the jump from brewing with just malt extract to brewing with all grain.

The second of these - brewing with all grain rather than just malt extract - was a true gift. He started homebrewing about five months ago, so I had a whopping seven-month lead on him. But over the last month or so, I'd become less of a mentor for him than a true peer, taking advice as much as I give it.

And I knew this was going to happen. When it comes to cooking, I stick to the recipe, and he fiddles. I try to master what the recipe intended, and he just tries to make something tasty. In a way, I'm the scientist and he the artist, which is going to favor me for consistency but him for some truly phenomenal break out beers.

About a month ago, he decided to make the leap into brewing with all grain. As he and I learned the new process together, we both realized we could easily to this. All grain brewing can be intimidating for extract brewers - as it was for me. All grain brewing tends to require a greater level of control over temperatures and water volumes. But his boldness and curiosity opened the door for both of us.

Two weeks ago, he was visiting from out of town and helped me brew my first small, all grain batch. I enjoyed it so much, I brewed a 3-gallon batch last weekend. And I enjoyed that so much, I brewed another 3-gallon batch this weekend.

The batches the last two weeks went very well. But this week, something went wrong. I recently started using the timer feature in my brewing software. I mistook a single alarm and starting adding my ingredients at the wrong times. I ended up finishing my "60-minute" boil 10 minutes too soon, and I didn't realize what had gone wrong until I was 5 minutes into chilling the sweet wort down.

I immediately did two things. First, I remembered the homebrewer's mantra to relax and not worry. I came up with a feasible plan to rescue my misstep. Second, I called my brother for his advice. If I take the boil pot out of the water bath for chilling and bring it back to a boil for another 5-10 minutes, I should be good to go, right? I knew it'd be okay, but hearing his confirmation brought a lot of peace of mind.

So, little bro, you weren't here to help me brew this amber ale, but every time I drink it (starting in 6 weeks!) I'll think of you.

Tuesday, January 29, 2013

Happy Anniversary!

The first anniversary of my first brew day passed uneventfully yesterday. It sneaked up on even me, not realizing it until last night.

I've logged a satisfying number of brews this year: an amber ale, a pale and also an extra pale ale, a brown ale, a saison, and three English ales (a Mild, a Special Bitter, and a Porter). I wrapped up the year with two all grain beers: a Sierra Nevada Pale Ale clone, and an ale called Dirty Water Brown from Jamil Zainasheff and John Palmer's book, Brewing Classic Styles.

I think I ended up bottling about 35 gallons of beer, or about 60 six packs. Many of those six packs were gifted to friends and family who gave me probably too generous feedback. They were probably just happy to have the free beer!

Things I've learned about brewing this year:
  • Keep your equipment clean.
  • Keep everything sanitized after the boil.
  • Use fresh ingredients.
  • Use the right bottling equipment or you'll waste beer all over the kitchen floor.
  • Having the kids help with the hobby makes for a great bonding experience.
Things I've learned about myself this year:
  • I take myself way to seriously. Relax, and enjoy a glass!
  • Having homebrewing friends can be a very good thing. Some of the best beers I've ever tasted came as samples from fellow homebrewers.
  • I shouldn't apologize so much for things that I do that I think are sub par. I've long known I'm the worst critic of myself. Life is so much nicer when I can simply enjoy the things that I have and be thankful for those around me. I'm glad I have family and good friends who remind me to give myself a break.
  • Having the kids help with the hobby makes for a great bonding experience.
Goals for this next year? Brew as often as I can, drink the beers I enjoy drinking, don't be afraid to try something new, and be thankful for everything I have.

That doesn't sound too difficult!

Sunday, August 12, 2012

Will it Float? Extra Pale Ale Edition

If you haven't seen Tom Dickson's YouTube channel, Will it Blend? you should. From iPhones to super glue, he'll throw it in his Total Blender to see if it will indeed blend. Usually, it does, and his campy dialog and 60's game show theme music have driven almost 200 million video views on just over 100 uploaded videos.

As a homebrewer, I was inspired to ask, Will it Float? I called craziness the first time I heard about an ice cream float made with beer, but I figured, let's give it a shot.

Most beer floats are made with some sort of malt forward brew, like a stout or brown ale. Makes sense. Cream and bread belong together: ice cream and cake, milk and cookies, strawberry shortcake with a huge dollop of whipped cream atop.

I'm down to the last few bottles of an extra pale ale I brewed almost five months ago. At the outset, it was considerably more bitter than I was expecting. The bitterness eased off after a few months, leaving room for the Cascade hops to speak their piece. If I serve it at a warm enough temperature - around 50 or 55F - the caramel notes from the hops pop up, but it's still a predominantly hoppy beer.

So I wondered, will the creaminess of the ice cream balance the hop bitterness from the extra pale ale? Only one way to find out.

Ales are best served warmer than most people expect - between 45 and 50F, sometimes as warm as 55F. But for a float, you want that drink to be as cold as possible so the ice cream doesn't melt before you can get your spoon into it. I promoted the beer from the fridge to the freezer (along with my mug), set a timer, and pulled it out after about 15 minutes.

Just like a root beer float, pour the drink first, filling the mug to about half full. Pour slowly down the side of the glass, because you want to minimize the foam. Add a couple of scoops of ice cream. This will generate foam, so watch for a foam over. After it subsides, add more beer if you'd like. Then enjoy!

I was hoping the ice cream would balance out the bitterness like it balances out the tartness of a cherry pie, but the hop bitterness was still front and center. If you like your beer hoppy, you'll likely enjoy it as a float. If not, stick with the malty brews instead.

Will a hoppy extra pale ale float? It will float, but only if you're adventurous enough to try.

Saturday, July 7, 2012

Christmas in July

Waiting (patiently) for UPS
I think my friends and family would describe me as a mild mannered bloke, but there is definitely one thing that makes me act like a kid: the delivery of new beer ingredients!

UPS normally delivers to our house around 5 p.m., but on ingredient delivery day, they drag their feet and get here closer to 6. But the driver is always pleasant, so it's hard to get mad at him. Wish I could offer him a fresh homebrew.

Upon arrival, I have a routine:
  1. Open delivery box, careful not to elbow any curious onlookers.
  2. Review the contents against packing list. I have had missing ingredients before. Better to discover it now than on brew day! I look at the initials of the guy who assembled my gift and silently thank him.
  3. Inspect the liquid yeast package to make sure it's in decent shape. After all, it's the yeast that makes the beer, so we must handle the precious with tender loving care.
  4. Place yeast package in fridge, unless I'm brewing the next day.
  5. Open the pouch of specialty grains, and stick my nose in as far as humanly safe. The specialty grains give the beer much of its color and glorious aroma. Depending on the style of beer I'm brewing, the grains can be anywhere from bready and biscuity to chocolaty and coffee-like.
  6. Make everyone else in the house smell how good the grains are. I know they appreciate me being so considerate.
  7. Pinch out a single grain and throw it in my mouth. There may be 3-5 types of grains in there, so I must take several taste samples.
  8. Give the kids samples of the grain and explain why they taste so sweet (the grains, not the girls).
  9. Inspect the sealed hops pouches and wonder what they smell like. I won't open them until brew day, in order to preserver their spicy, floral and/or citrus aroma.
  10. Put everything else back in the box and set it aside.
  11. Wait 5 minutes, and open up the box and smell the specialty grains again. Close box. Repeat until wife gets exasperated.
The last step is to wait - patiently or otherwise - for brew day, which will usually be in less than 2 weeks. Alas! more waiting.

Saturday, June 30, 2012

Petite Saison Update

This morning, I bottled the Petite Saison d'Ete into 43 bottles plus one 22-oz. bomber. Everything went smoothly and the whole procedure lasted about 3 hours, including clean up.

I did get some help from both kids today, too. The younger one put the bottles back in the cases after I capped them, and the elder (who was my helper on brew day) labeled the caps with a big S for saison. On bottling day, there really isn't much to help with, and I had done most of the work anyway before the were even out of bed.

The biggest thing I look forward to on bottling day is tasting the beer's progress. I have to bear in mind that the beer is flat (they carbonate in the bottles) and warm, but tasting still gives a good indication of where the flavor is heading.

At bottling today, the saison tasted surprisingly similar to Boulevard's witbier I just bought a week or two ago. When I opened the fermenter, I was struck by the pleasant clove notes, and wifey tasted banana and nutmeg in the sample I pulled. To say the least, I'm very excited about how this beer is going to develop in its bottle conditioning over the next 2-3 weeks.

Before I move the beer from the fermenter to the bottling bucket, I measure the density (specific gravity) of the beer with a hydrometer.  By measuring the gravity before and after fermentation, I can tell about how much alcohol by volume (abv) was produced. With an original gravity of 1.044 (water is 1.000) and a final gravity of 1.005, we should end up with 5.2% abv. My target original gravity of 1.041 and target final of 1.008 projected an abv of 4.4%. Looks like my saison may not be so petite after all.

Tuesday, June 19, 2012

Boulevard Summer Seasonal: ZON

I headed to my corner beer store last weekend hoping to try something I hadn't had before. I just learned about a microbrewery called Tallgrass, out of Manhattan, Kansas. I wanted to try their oatmeal stout, but alas! it was not to be. The store carried another brew from Tallgrass, but not the Buffalo Sweat.

But they did have the summer seasonal from Boulevard Brewing Company here in good old KC: ZON (pronounced "zone"). Despite this seasonal being brewed for at least the last 10 years, this was the first I'd seen it. It fit the bill for being something new to me, so I grabbed the store's last six pack.

ZON is a Belgian witbier ("white beer"), a style that is characterized by very light color, a banana and clove aroma, flavored with coriander and orange peel, and having a light to medium body. Belgian wits often appeal to non beer drinkers, since the hop bitterness and alcohol character are both low, and the beer is filled with flavors that are not characteristic of American ales.

I loved this beer from the moment I poured. The color is a pale straw blonde, and very cloudy - as with many Belgians, it's best to swirl the last inch or two in the bottle to pick the yeast sediment back up into suspension and pour all of it into the glass. After all, it's the yeast that gives the wit so much of its personality.

The aroma was fantastic - prominent notes of cloves, and not as much banana as I was expecting. Most wits are best served at around 50 degrees F (about 10-15 minutes out of the fridge), and it's at these warmer temps that you can pick up more of the complexity. The higher degree of carbonation gives the beer a nice head that sticks around. ZON's flavor has a very mild herbal spiciness from the coriander, and the orange peel - which is easier to pick out - balances it nicely.

ZON comes in at 4.4% alcohol by volume, but the fruity and spicy profile hides a lot of that alcohol character that we're used to in the US.

I know that Boulevard distributes widely across the country. If you're able to pick up a six pack locally, you wont' be disappointed. And if you are, I'll gladly finish the rest off for you.

Thursday, June 14, 2012

How It All Started

I've been asked more than a few times what got me started in the hobby of making my own beer at home.

A few years ago, Alton Brown on Good Eats showed how easy it is to brew your own beer. I was fascinated that you could even do such a thing. My palette was already refining with my other favorite brewed beverage - coffee. I knew there would be equipment to purchase for homebrewing beer, and I didn't know that I'd enjoy the hobby enough to warrant the expense.

Just this last fall, I discovered that a coworker of mine homebrews. His next brew was going to be an oatmeal stout, and he invited me to join him. It was four of the funnest hours I'd had in quite a while. He walked me through all the steps of the brewing process. We shared leftover enchiladas for lunch, and I tasted a couple of his beers. My favorite was a pumpkin ale that he and one of his brew buddies had done, and it was exactly the kind of beer I would have paid for at the store. I was hooked.

A month later, he invited my whole family to join his for dinner, and to bottle the oatmeal stout. Our kids played games, our wives chatted, we got down to business. Bottling was simple - in fact, I found that nothing in the whole hobby was terribly complicated. And I enjoyed yet another of his beers with our spaghetti casserole dinner.

I saw from a couple of catalogs that I could get into all the equipment I needed for around $200. I saved my pennies and made the purchase, and I enjoyed my very first brew day this last January. When I cracked open my first amber ale six weeks later, I was speechless at how well the recipe had come together and how easy it was.

I have four brews under my belt now, including the saison that went into the fermenter just this last weekend. I think I'm going to be hanging onto this hobby for a while.

Saturday, June 9, 2012

Brew Day with Dad

It comes around for me about once every other month - brew day!  Today's brew: the Petite Saison d'Ete from Northern Brewer.

I've never brewed a saison - I've never even tried a saison - but rumor has it it's a great summer beer. Northern Brewer says:
This session-strength Saison of summer pours tawny-gold and perfumes the air with tangy yeast and pungent hop aromas. The flavor is lightly earthy with spicy, flowery hops and a grain-and-bread malt character; caramel malt dukes it out with Saaz and Styrian Goldings through the middle before a palate-cleansingly dry finish.
In about six weeks, we'll see how that pans out.

Today was a special brew day, because my 9-year-old daughter helped.  She gets as excited about brew days as I do.  She probably picks up on the positive energy from me and wants to share the excitement.  But wherever she gets that energy, we did everything today together.  We cleaned and sanitized the equipment together, weighed out the hops together, she stirred while I added the malt extract, and together we tasted the wort - the liquid before the yeast is added and truly becomes beer.  She loved the sweetness of the wort after we added the malt, but she wasn't crazy about the bitterness after we started adding the hops.  To be honest, neither was I (it'll mellow and develop over time), but it sure is fun tasting the brew at each stage of the process.

She did leave me to clean up all the equipment afterward by myself.  Smart kid.

It'll be a hard wait, but after three weeks in the fermenting bucket and three weeks conditioning in the bottle, I'll get to taste my first saison.  And maybe I'll have to name it to commemorate today's daddy-daughter brewing session.